
DIY Mirror Frame
Don’t replace your old bathroom mirror, turn it into a new brand vanity! DIY mirror frame and save a bundle of money. Simply update your bathroom’s whole style by adding a frame to your plain mirror.
DIYing a mirror frame isn’t such hard process as you might fear. Any woman or man can do it easily at home (and more important inexpensively) Don’t worry, it can end looking very professional if you follow the steps!
Materials needed:
- Miter saw
- Paint or stain
- Paintbrush
- Caulk
- Liquid nails
- Pencil
- Measuring Tape
- Extra strength wood glue
- Fine sanding pad
- Dremel
The DIY mirror frame process is expected to take approximately four hours, and under 30$ bucks for the materials. This is How to frame bathroom mirror, and it can work for any room mirror too.
Easily DIY Mirror Frame Step-by-step
#Step 1 The measurements
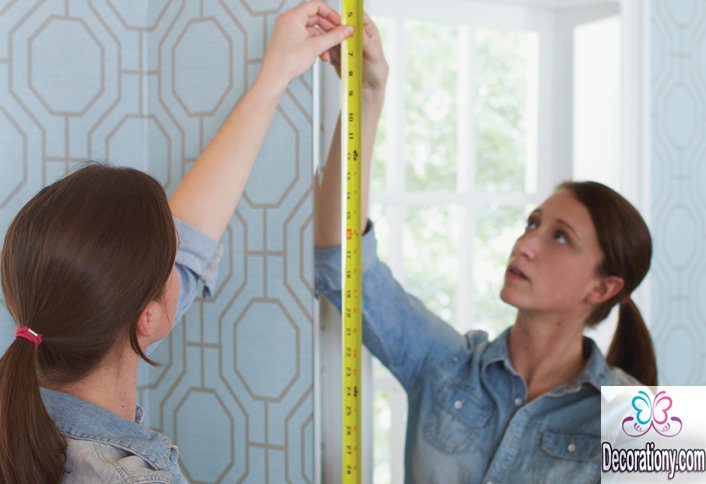
- Measure your mirror length and width with the measuring tape.
- Use any old boards you could find for the least budget.
- Or simply go to the nearest store (Lowe’s maybe) with your measurements and buy the needed materials.
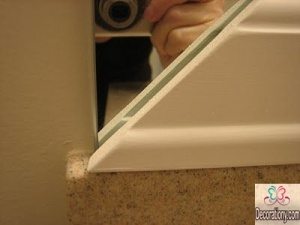
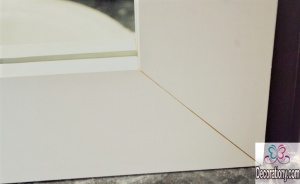
#Step 2 Miter the edges
- Use a Miter Saw to cut the wood (all four sides) at a 45-degree angle to make the outside portion in full length with the mirror. Just as shown in the below picture.
- Go to a home improvement store to have the materials cut properly if you made any errors that you can’t fix.
#Step 3 Sanding the frame:
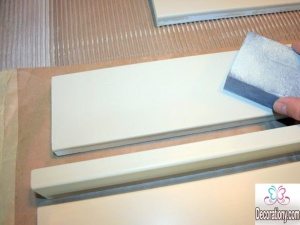
- Use the sanding pad to smoothen the wood, but don’t sand the angles too much so they can fit pretty much flush!
#Step 4 Painting mirror frames:
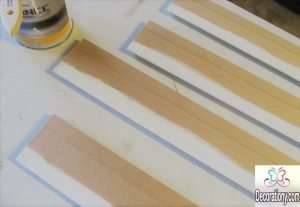
- Paint the front sides, let dry for two hours.
- Then paint the back sides’ trim edges and let dry for two hours. The back side trim edges will reflect in the mirror.
- Paint one or two coats on each one of your pieces.
- Make sure you painted the trim edges properly.
- For other options, you can use spray paint the four boards. (For black or brown frames painting)
#Step 5 notch the wood
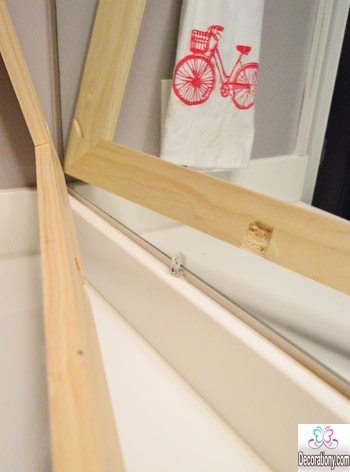
- Use a Dremel to notch the wood right where the mirror clips are to make the frame flush against the mirror.
- After you’ve notched the wood for the clips it should fit like a puzzle. Test that by putting the frame on the mirror, make sure everything fits perfectly.
#Step 6 Framing the mirror (Almost there!)
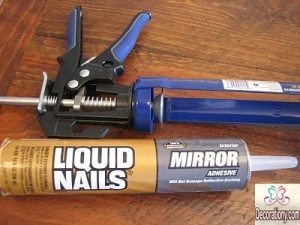
- Use liquid nails to glue the boards to the mirror, do each side per time, start with the bottom piece.
- Don’t get too close to the edges, you don’t want it to show up in the mirror.
- Place the board on the mirror properly. Use a bubble level and a pencil to determine the proper placement.
- Hold tight to make sure everything is okay and the frame won’t fall down. (Liquid nails dries quickly tho)
- Then proceed with the following board until you’ve placed your new mirror frame all by yourself.
 More ideas on Pinterest
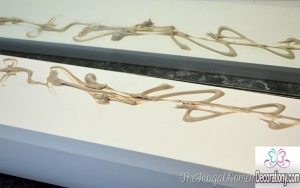
#Step 7 Filling the joints
- Your mitered joints might not match perfectly, that’s just fine. Use caulk to fill along the joint.
- After applying the caulk, wet your finger and run it over to smooth.
- After the caulk is dry if it’s too obvious you can touch the area up with paint.
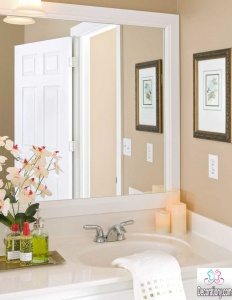
Now you’re all done, this should be the final look!
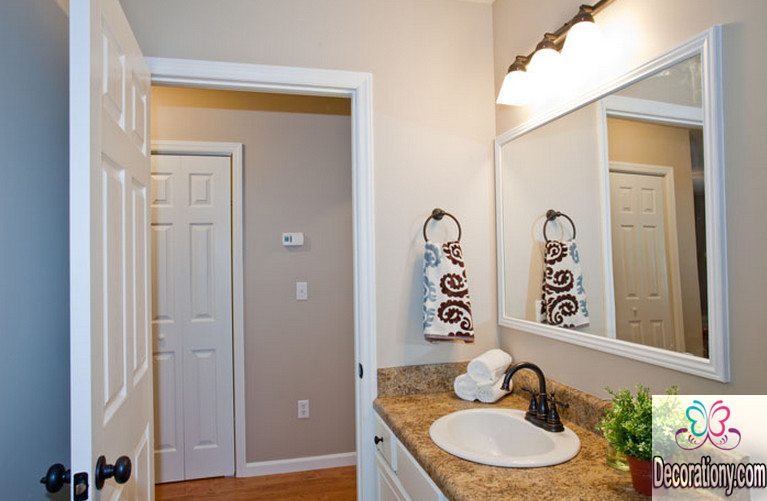 Ta da!
Here you go! This is a DIYer’s favorite dream, I guess four hours didn’t mean a thing for a creative DIY-lover, Especially when you see the results!
Let us know how you DIYed your mirror frame and how the process went! We hope this was helpful. Leave your comments for any further tips or questions. We love hearing from you!